17 Greenhouse Layout Ideas That Make Every Inch Feel More Functional
Every greenhouse starts as a dream of abundance and, without a plan, ends as a maze of mismatched shelves with one path you shuffle through sideways. The structure isn’t usually the problem — the layout is. Square footage in a greenhouse behaves like counter space in a kitchen: it disappears unless every zone has a job. These greenhouse layout ideas cover seventeen ways to organize benches, paths, storage, and growing zones so the whole footprint works, whether you run a six-by-eight lean-to or a backyard glasshouse with room to stroll. You’ll find classic aisle plans and clever vertical stacks, potting corners, propagation zones, and the one seat every greenhouse deserves. Each idea includes measurements and placement logic, because inches matter under glass. Save the layouts that fit your structure, then sketch your floor plan before moving a single pot — ten minutes of paper saves a season of shuffling. My own greenhouse went through three bad layouts before I finally learned these rules.
1. The Classic Center Aisle, Done to Measure
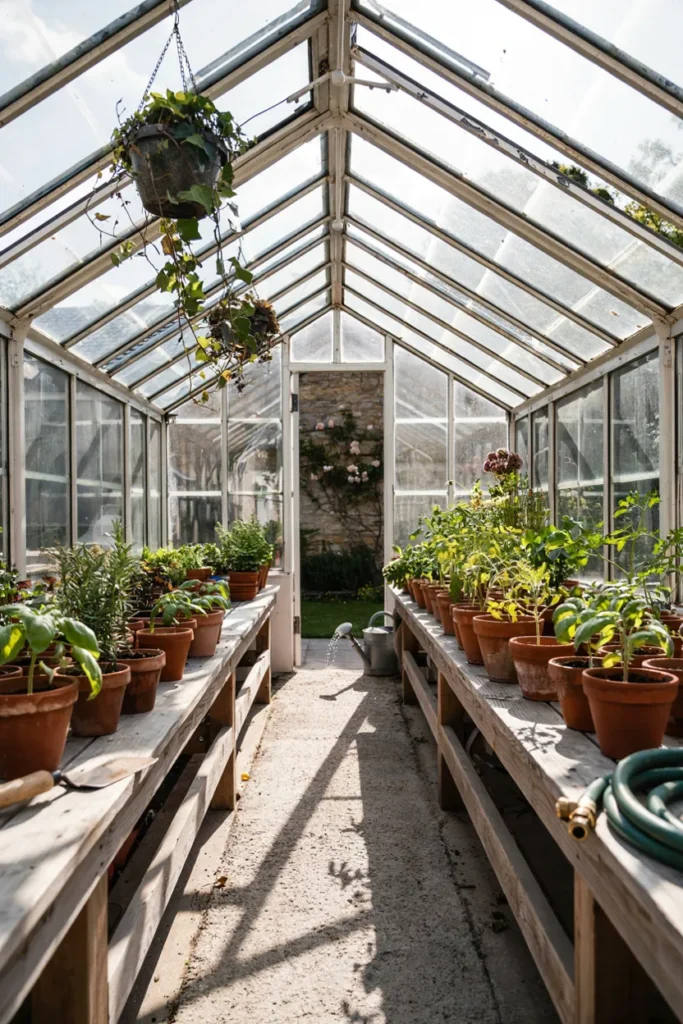
The two-benches-one-aisle plan survived a century of greenhouse fashion because the geometry works: every plant within arm’s reach, light shared evenly, and one clean walking line from door to back wall. Most layout misery comes from getting its proportions wrong — an aisle too narrow to turn in, benches too deep to reach across. Dial in the measurements and the classic feels custom.
Benches run 24 to 30 inches deep — the honest reach of an arm — at a waist-friendly 34 to 36 inches tall. Give the aisle at least 24 inches, 30 if a wheelbarrow ever enters. Gravel or pavers underfoot drain and store heat. Run the layout north-south so both benches share sun equally, and keep the back wall clear for the tallest crops.
2. The U-Shape That Adds a Third Bench Free
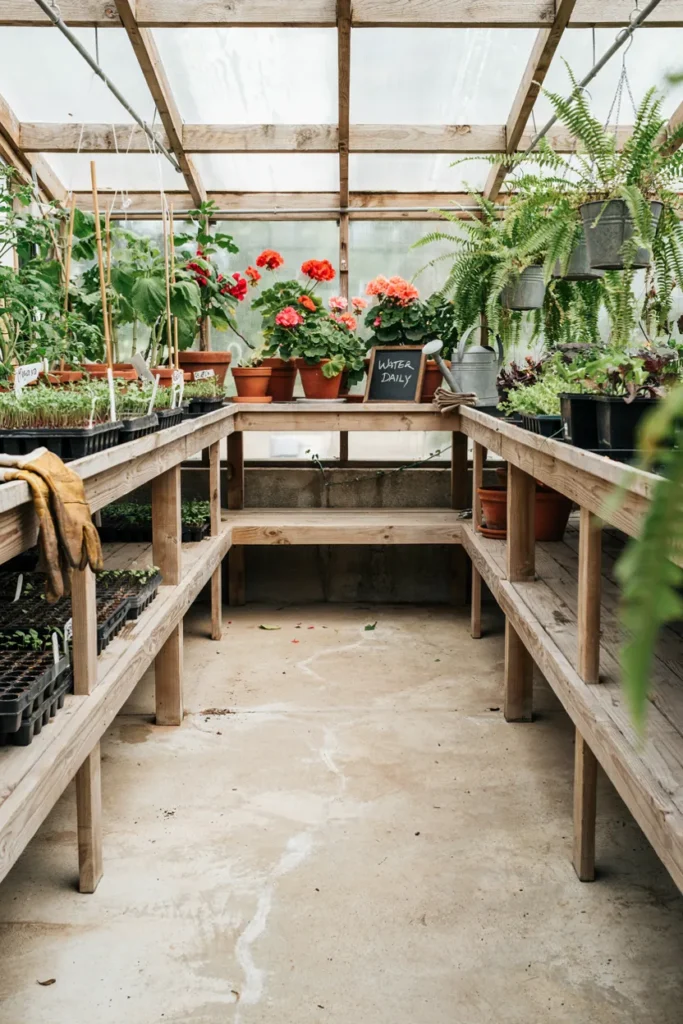
Connecting the two side benches across the back wall costs a few boards and buys an entire third growing surface — the U-shape is the highest-yield move in small greenhouse planning. The wraparound counter puts everything within a pivot of the center, kitchen-triangle style, and the back bench becomes prime real estate for the plants that love the deepest, most stable warmth.
Keep the U’s interior at least four feet across so you can turn, crouch, and carry trays without elbow damage. Corners are reach-killers — angle them at 45 degrees or dedicate them to tall permanent residents like a fig or citrus in a pot. The back bench can run deeper than the sides, up to 36 inches, since you only approach it head-on.
3. Peninsula Benches for the Wide Greenhouse
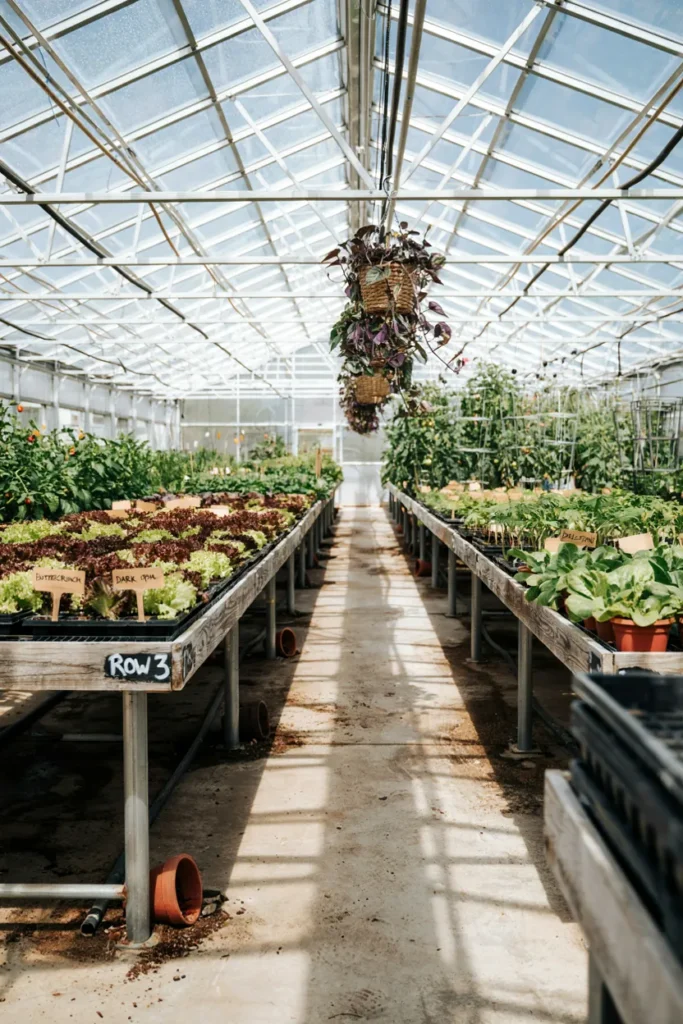
Once a greenhouse passes ten feet wide, wall-hugging benches strand a prairie of dead space in the middle. Peninsulas fix it: short benches jutting from one wall like library stacks, multiplying both growing surface and access aisles. Commercial growers plan this way because the math is unbeatable — up to thirty percent more bench area than perimeter layouts in the same footprint.
Run peninsulas off the north or west wall, each about six feet long and 30 inches wide, with 24-inch aisles between. Every peninsula becomes a zone: propagation on one, tomatoes staging on another, flowers on the third — organization by geography beats labels. Leave one perimeter wall bench-free for tall crops, climbing supports, or the potting station the layout will eventually demand.
4. Stack the North Wall to the Roof
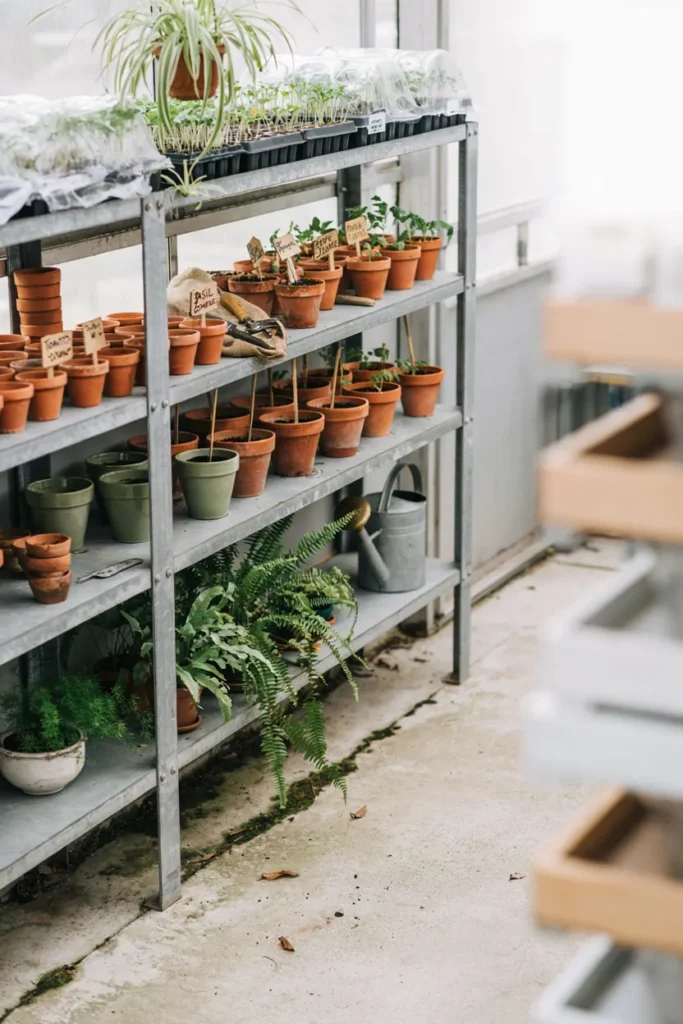
The north wall is the one place vertical stacking costs nothing: shelves there cast their shadow outside the greenhouse, not on your plants. Racking it to the roof quadruples storage-and-growing surface on the structure’s least valuable light real estate — seed trays up top where warmth pools, shade-tolerant plants below, and every spare pot finally off the benches that should be growing things.
Fit shelves 10 to 14 inches deep at height gaps matching what lives there — six inches for seed trays, twelve-plus for pots. Wire or slatted shelving lets light and water pass through tiers. Reserve eye-level for daily-attention plants, the top for the light-hungriest seedlings, floor level for dormant bulbs and supplies. One sturdy step stool makes the whole wall reachable.
5. A Potting Corner With Everything at Hand
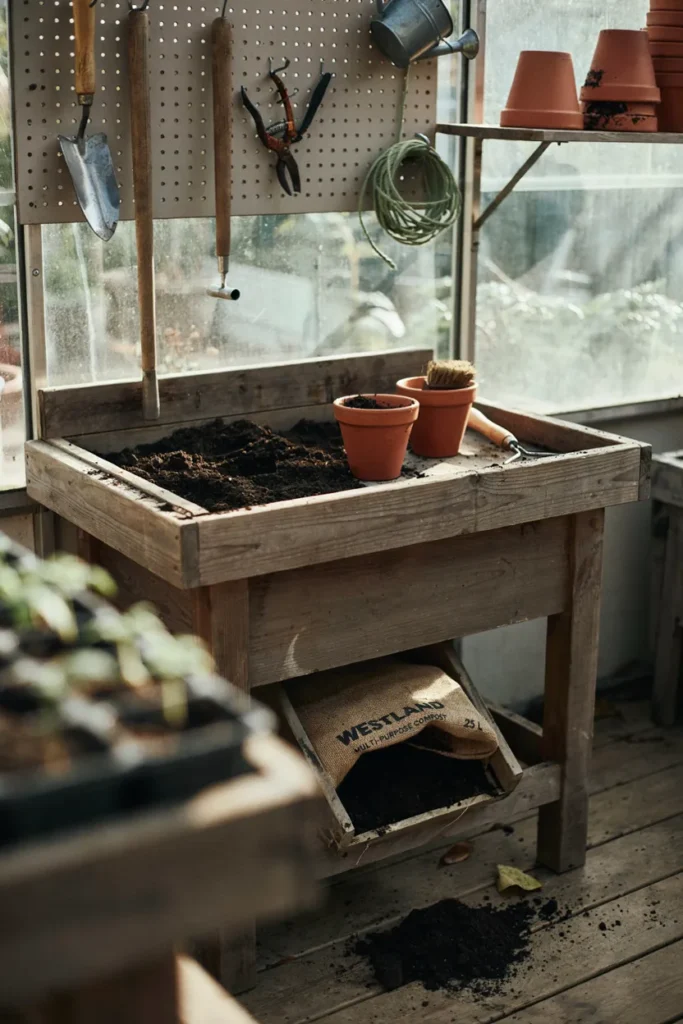
Potting on a growing bench is how soil ends up in everything and pots end up everywhere. One dedicated corner — bench with a soil basin, pegboard of tools, compost bin sliding underneath — contains the mess and speeds every task, because nothing gets hunted for. It’s the greenhouse equivalent of a kitchen’s prep station, and it earns back its three square feet within a week.
Claim the corner nearest the door for easy compost hauling, ideally the shadiest one — potting needs no sun. A recessed basin or high-sided tray keeps soil corralled; a hinged pegboard above holds snips, dibbers, labels, and twine at eye level. Slide bins for compost and perlite below. One deep drawer for seeds and hand tools ends the era of the everything-pile.
6. Partition a Propagation Warm Zone
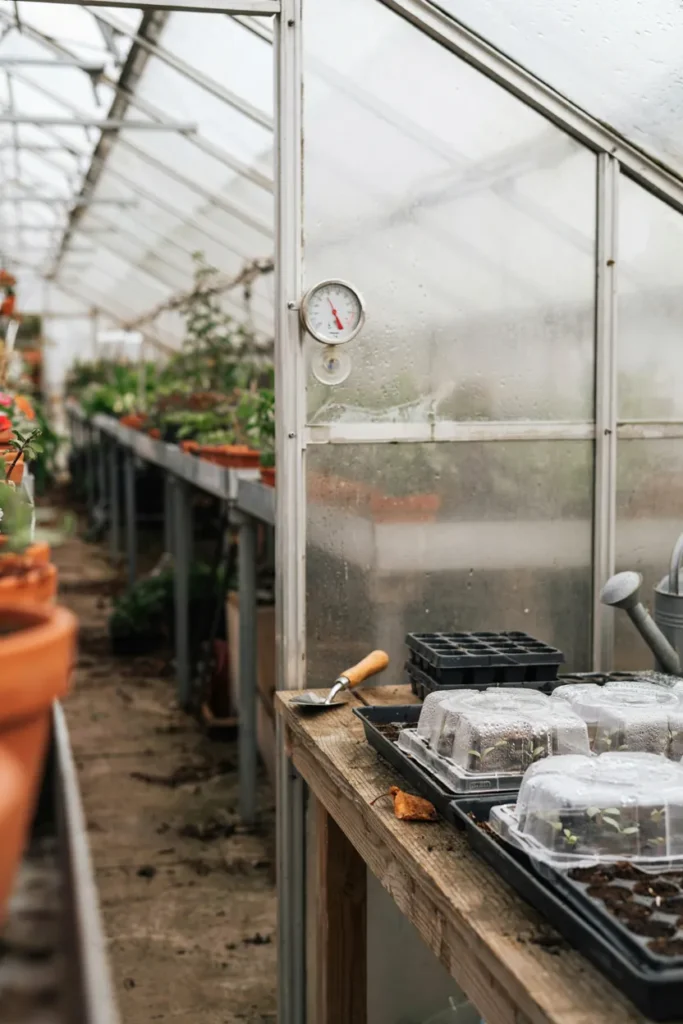
Heating an entire greenhouse to seed-starting temperature costs a fortune; heating a closet-sized corner of it costs pennies. A clear partition wall across one end creates a propagation chamber where heat mats and humidity stay concentrated — a nursery within the nursery. Seedlings get tropical conditions, the main house stays economical, and February starts become genuinely affordable.
Frame a simple wall of twin-wall polycarbonate with a hinged or sliding panel door, sealing the greenhouse’s end bay — six to eight feet is plenty. Inside: heat mats, a thermostat, and shelves tiered for trays. Site it at the end opposite the door to avoid cold drafts with every entry. Come summer, the same chamber converts to shade-cloth cover for cuttings.
7. Put the Under-Bench Dark to Work
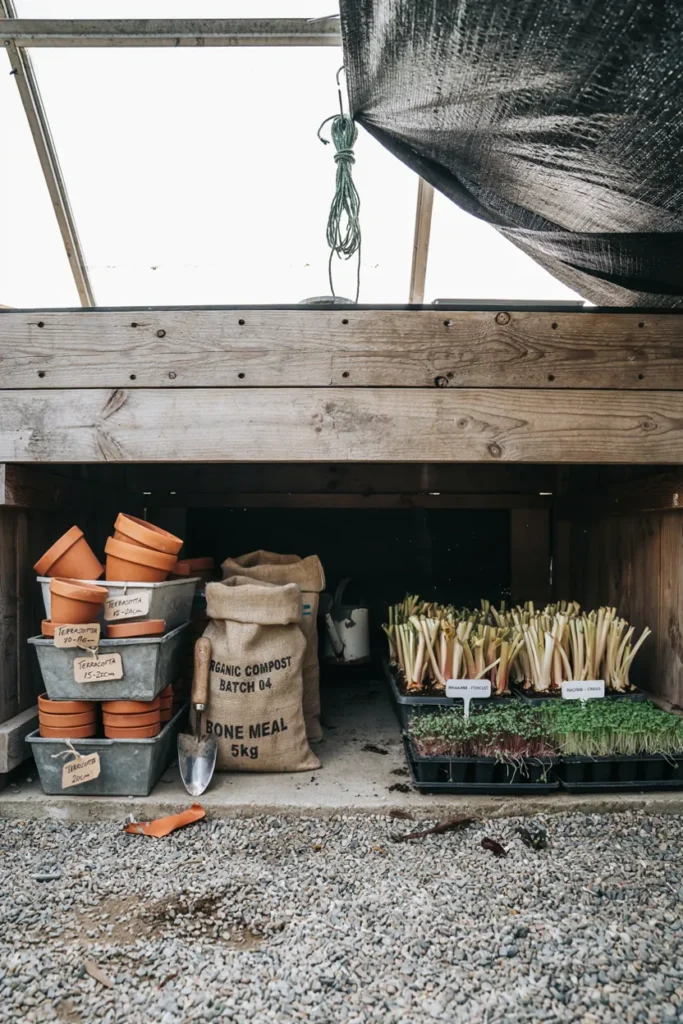
Half of a benched greenhouse’s volume sits below the counter, mostly hosting cobwebs. That shaded underworld is climate few gardeners exploit: cool, dim, frost-free — precisely what stored bulbs, dormant plants, forced rhubarb, and germinating trays want. Organizing it doubles the structure’s working capacity without adding a single pane of glass overhead.
Split the under-bench by wall: storage crates on labeled runners along one side, growing projects along the other. Mushroom kits, microgreens, and overwintering dahlias all thrive down there. A skirt of shade cloth on wire keeps things tidy-looking and even cooler. Raise everything off the floor on slats or bricks — the under-bench is useful, but it’s also where spills and splash land first.
8. Claim the Air: A Hanging Rail Layer
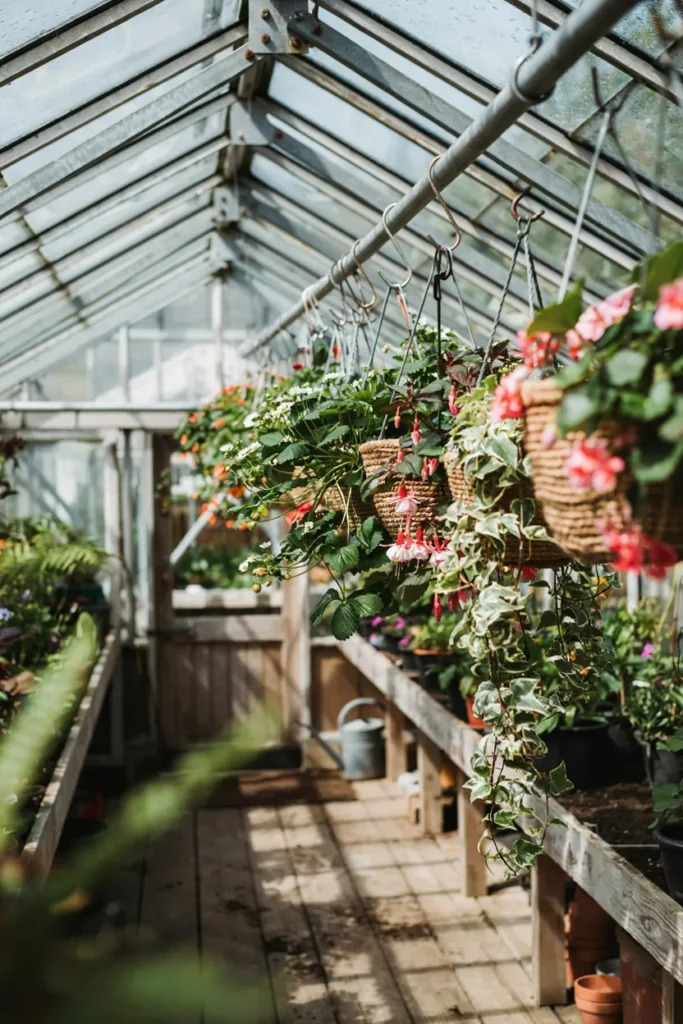
Above head height, a greenhouse is empty sky — and strawberries, trailing tomatoes, and fuchsias would happily live there. A rail or cable run along the ridge adds a full aerial growing layer: baskets at staggered heights, runners cascading, floor and bench space untouched. Victorians packed their glasshouses this way for a reason; the warmest, brightest air in the building is up there.
Hang from the frame’s structural ribs or a dedicated rail rated well beyond wet-basket weight — a watered fourteen-inch basket runs fifteen pounds. Stagger heights so baskets shade paths, not benches, and keep the rail off the true south line. Trailing strawberries and tumbling cherry tomatoes earn their height in harvest; a pulley hook or long-spout wand keeps watering civilized.
9. In-Ground Beds Down the Middle
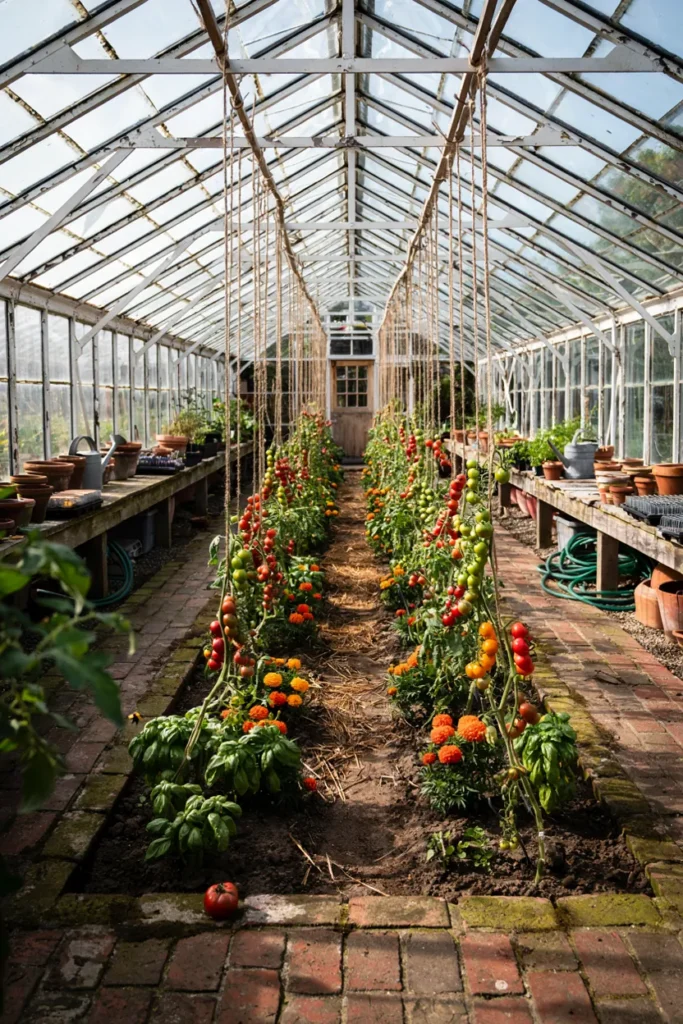
Benches suit pots, but the biggest greenhouse harvests come from plants with their feet in real ground. Swapping the center for in-ground or deep raised beds turns the structure into a true growing house: tomatoes climbing strings to the ridge, cucumbers arching overhead, roots running deep and watering demands dropping by half. The glasshouses that feed families are laid out this way.
Dig or build the center bed 24 to 30 inches wide, leaving 20-inch paths both sides, with wall benches kept for starts and shorter crops. Refresh the soil generously each season — enclosed beds work hard. Run strings from ridge anchors for vertical training, and underplant tall crops with basil and salads. The bed placement is permanent, so commit only after a season of watching your light.
10. Rolling Benches That Make Aisles Optional
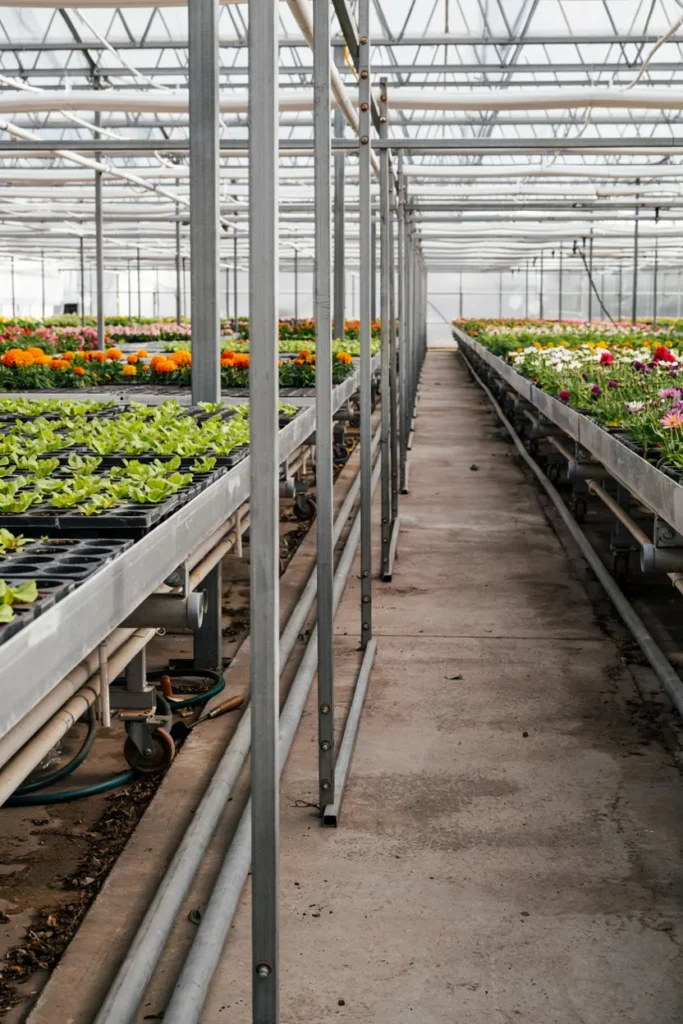
Commercial ranges hate paying to heat walkways, so they invented benches that roll: tops sliding side-to-side on pipe rollers, creating an aisle only where you’re currently standing. One floating aisle serves the entire house, and growing space jumps by a quarter or more. In a hobby greenhouse, the same trick means a six-by-eight suddenly benches like an eight-by-ten.
Kits exist, but the DIY is honest: bench tops resting on lengths of pipe that roll across level side rails, with stops so nothing slides off the end. Keep each rolling section short enough to shift with one hand when loaded. The system rewards discipline — one aisle open at a time — and pays it back in an extra season’s worth of bench every year.
11. A Water Station With a Rain Barrel Heart
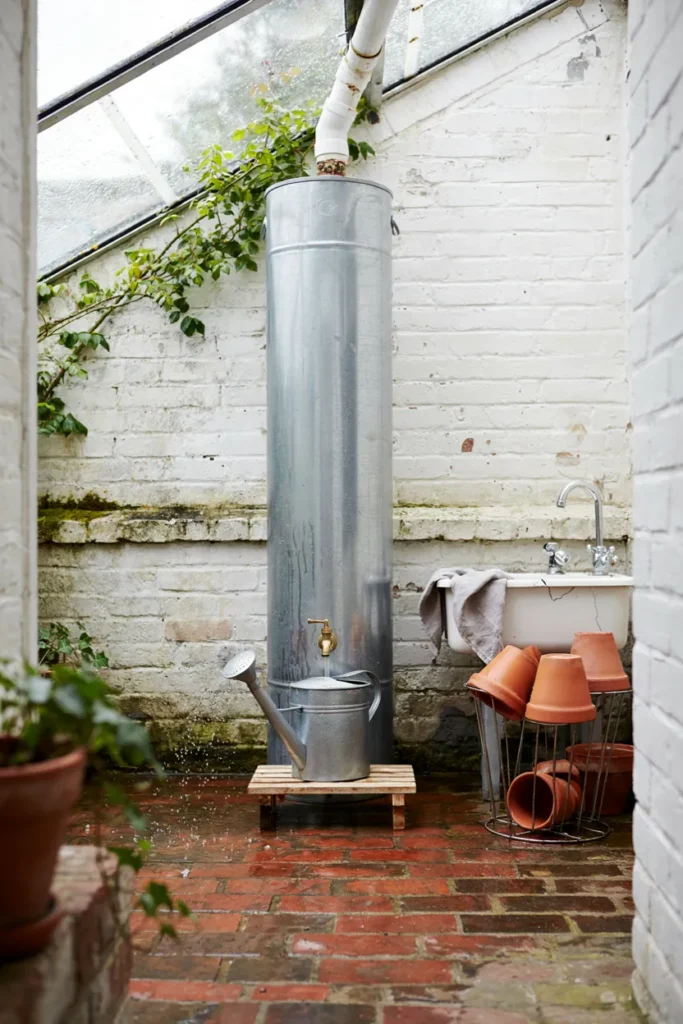
Hauling watering cans from the house kills more greenhouse enthusiasm than any pest. A water station inside the structure — rain barrel fed from the greenhouse’s own gutter, tap at can height, a small sink for rinsing — closes the loop: the roof harvests, the barrel stores, and rainwater at ambient temperature happens to be exactly what seedlings prefer over cold tap shock.
Fit gutters to the greenhouse eaves (kits suit most frames) feeding a slim barrel just inside or beside the door. Raise it on blocks so cans fill by gravity, and screen the inlet against debris and mosquitoes. A second linked barrel doubles dry-spell insurance. Add a shelf for the can, a hook for the wand, and winter-drain everything before hard frost.
12. A Grow-Light Rack for the Dark Months
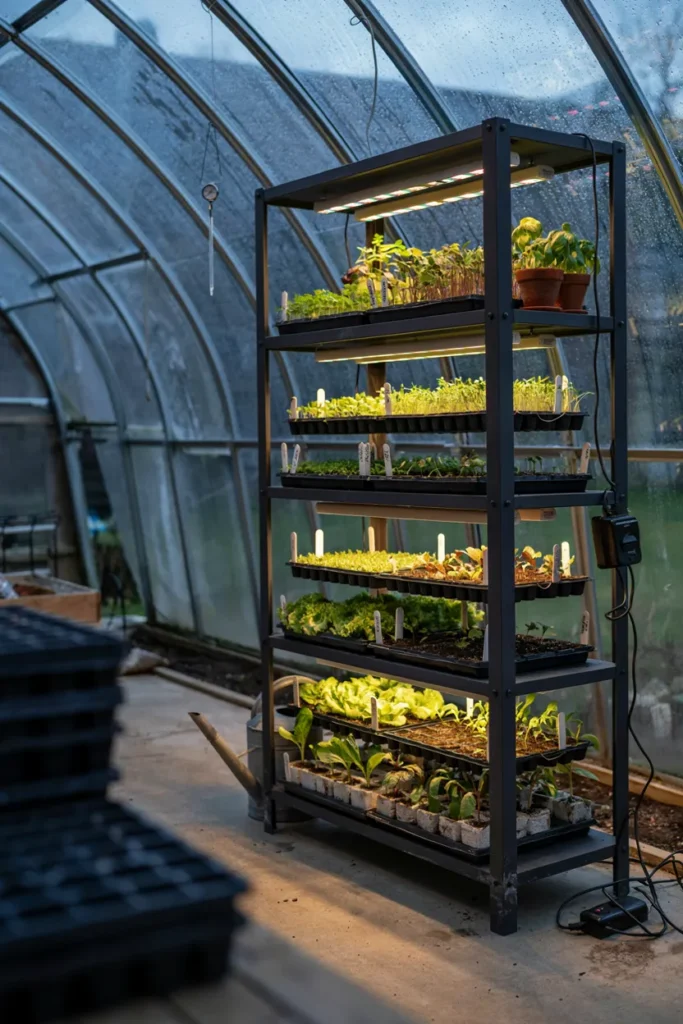
A greenhouse extends the season; a grow-light rack inside it abolishes the calendar. Four shelves, LED bars under each, a timer — and February behaves like May on two square feet of floor. The glasshouse handles humidity and shelter while the lights supply what winter sun won’t, making this the layout piece that converts a three-season structure into a year-round one.
A standard wire rack fits four trays per shelf with light bars zip-tied under each level, eight inches above the canopy and raised as seedlings grow. Full-spectrum shop LEDs run cool and cheap — sixteen hours on a timer. Park the rack against the north wall where its light robs nothing. Total draw is modest, and the head start on spring is measured in weeks.
13. An Archway for the Climbing Crops
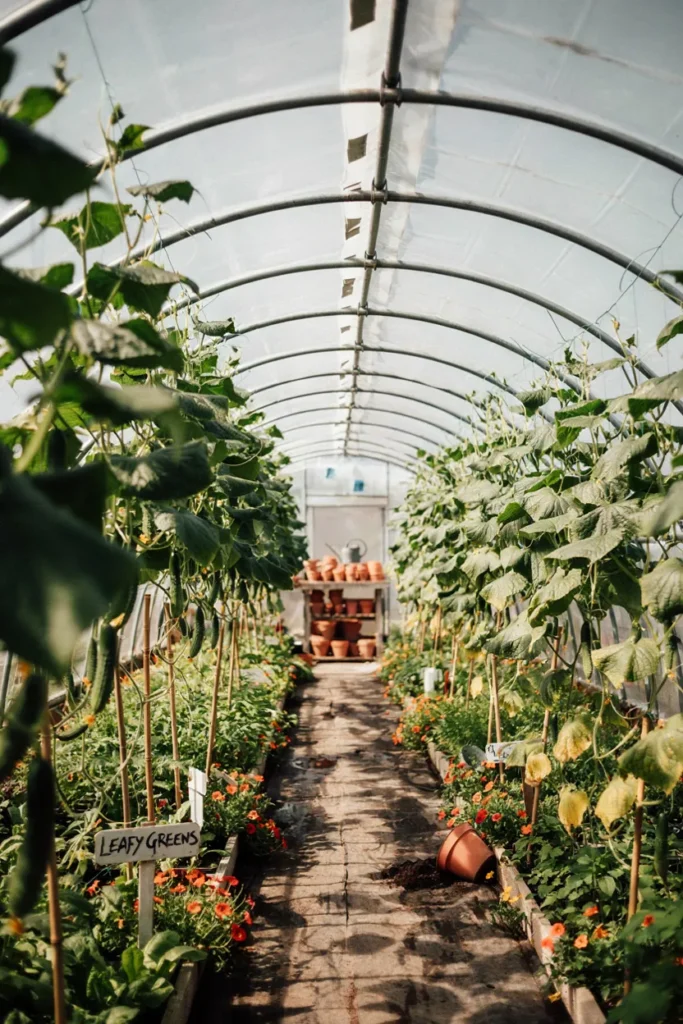
Climbing crops claim bench space grudgingly but take to an archway like they invented it. A mesh arch spanning the central path turns cucumbers, pole beans, and small melons into a walk-through tunnel — fruit hanging straight and clean through the mesh at picking height, path space doing double duty, and the daily walk to the back bench passing under a green ceiling.
A cattle-panel arch or purpose kit spans a two-foot path with feet planted in beds or large pots either side. Train two plants per side up and over; cucumbers and tromboncino squash produce their straightest fruit hanging free. Keep the tunnel’s top above head height and prune escapees weekly. The arch also casts its midday shade on the path — the one place shade is free.
14. Save Room for One Chair
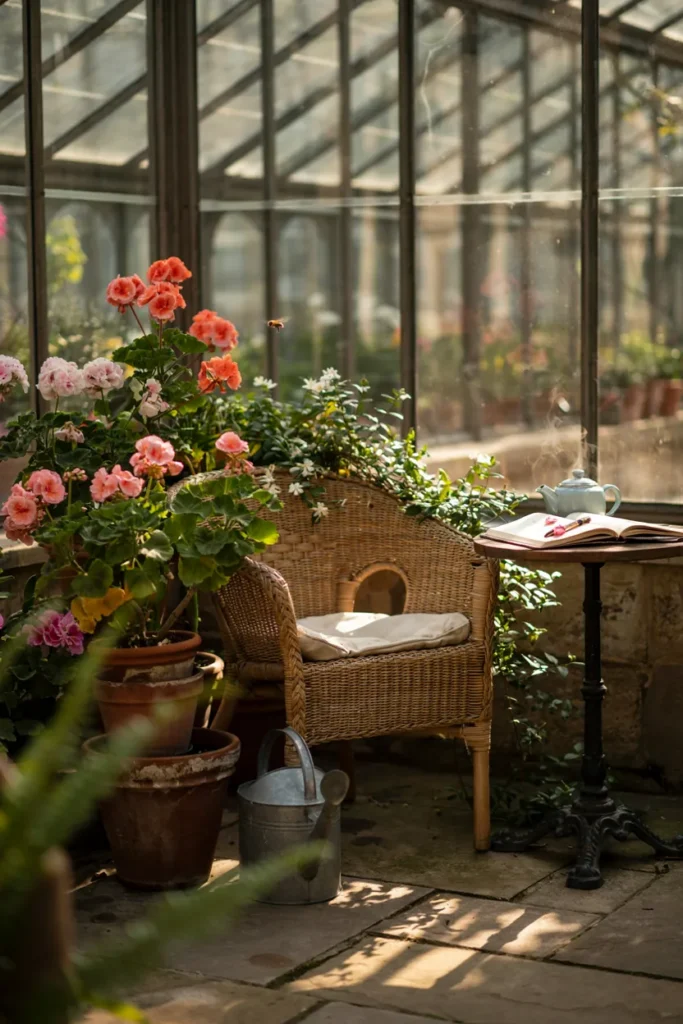
Somewhere in the plan, defend three square feet for a chair — because the greenhouse is quietly the best room on the property. Rain on glass, tea in a warm January corner, jasmine at nose height: gardeners who plan a sitting spot use their greenhouse triple as often as those who bench every inch. Productivity isn’t only trays; it’s the pull that gets you out there daily.
One chair and a table smaller than a barstool suffice, tucked in the corner with the evening light. Surround the seat with the fragrant pots — jasmine, scented pelargoniums, a lemon — since this is where noses linger. A shelf within reach for the mug and notebook completes it. When space wars flare in spring, the chair folds; it returns every September without asking.
15. A Tool Wall and Pot Wash That Stay Tidy
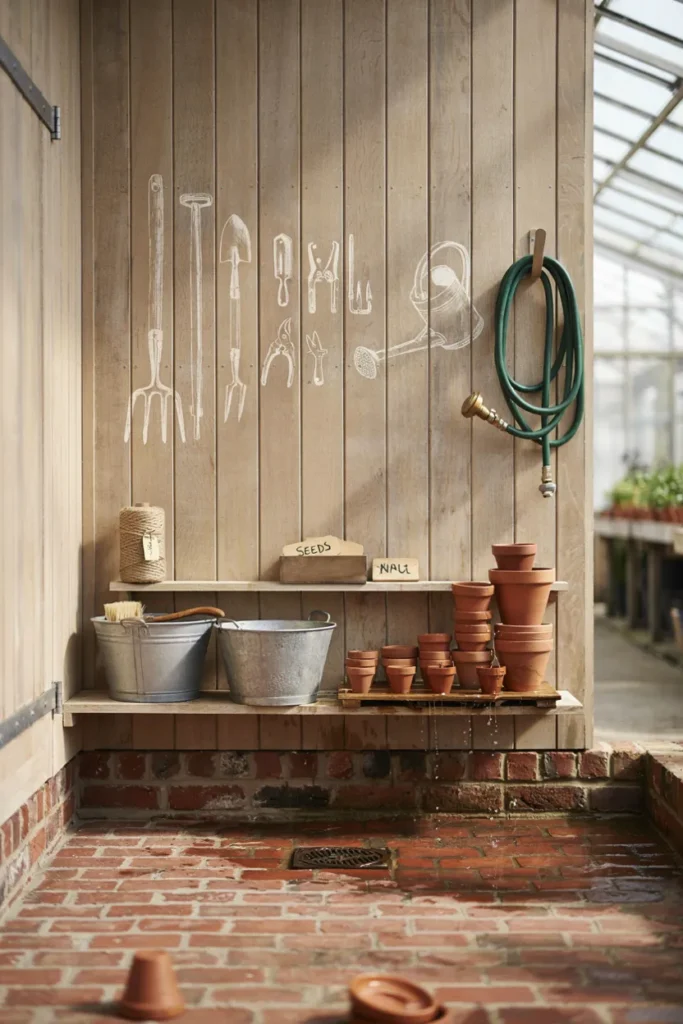
Greenhouses accumulate small chaos — snips in a pot, labels in a drawer, that trowel forever missing. A tool wall with an outline for every item and a two-basin pot wash below turns maintenance into muscle memory: everything visible, everything returning to its silhouette, clean pots drying in graduated stacks. Hygiene follows automatically, and disease pressure drops with it.
Mount a slatted or pegboard panel by the potting corner and paint or outline each tool’s home — the outline is what makes returns automatic. Below, two basins (wash and rinse with a splash of horticultural disinfectant) handle end-of-season pot duty. A drying rack beats towel-stacking wet clay. Ten minutes of setup, and the greenhouse stays inspection-ready all year.
16. Stage the Door Zone for Comings and Goings
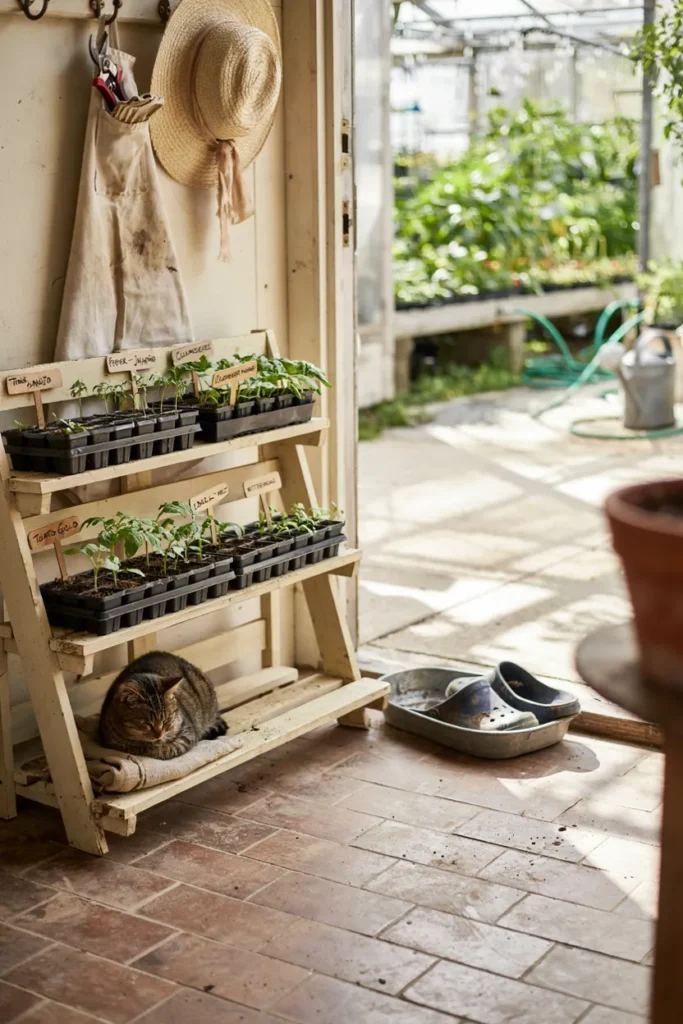
Everything entering or leaving a greenhouse passes one point — yet most plans treat the doorway as leftover space. Staged deliberately, it becomes the transition zone: shelves of seedlings hardening off before the big move outside, hooks for the apron and hat, a boot tray keeping soil where it belongs. The layout meets the workflow exactly where the workflow happens.
Fit a narrow slatted unit just inside the door on the hinge side, where drafts help acclimatize outbound trays. Reserve its shelves for in-transit plants only — the staging area dies the day it becomes storage. Hooks, boot tray, and a hanging clipboard for the to-do list finish the zone in eighteen inches of depth. Traffic flow is a layout feature; design for it.
17. The Lean-To Layout That Lives Large
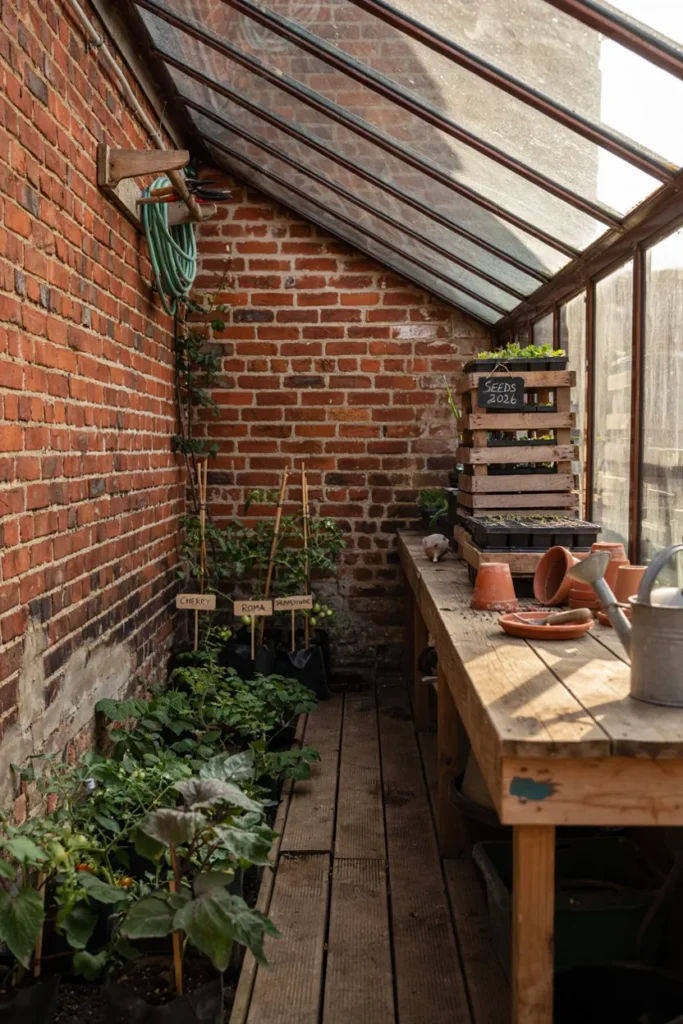
The lean-to — glass on one side, house wall on the other — is the smallest greenhouse format and quietly the smartest: the masonry wall stores daytime heat and releases it all night, a free radiator no freestanding structure owns. Laying it out means embracing asymmetry: growing along the glass, storing and stacking against the brick, and folding flat anything that doesn’t earn its footprint.
Run one bench along the glazed side, floor-level grow bags against the warm wall where tomatoes ripen on stored heat, and a shelf tower at the short end. A fold-down potting shelf on wall brackets appears for work and vanishes after. Hang the top of the masonry wall with rails and hooks — in a lean-to, the house wall is the storage wing.
Conclusion
A greenhouse rewards planning like nothing else in the garden: the same glass box can hold a cramped shelf jumble or a small working paradise, and the difference is entirely floor plan. The thread running through these greenhouse layout ideas is thinking in zones and layers — benches at the right depth, the north wall stacked high, the dark beneath put to work, the air above hung with harvest, and one corner kept human with a chair and a teapot. Match the layout to how you actually garden: seed-starters need the warm chamber and light rack, kitchen growers the center beds and archway, collectors the peninsulas and hanging rail. Sketch your footprint, place the door zone and water first, and let everything else negotiate. Save your favorite layouts to your Pinterest boards so the plan is waiting when the structure goes up — or when this winter’s reshuffle finally happens. Under glass, organized inches grow like compound interest. And when the glasshouse work is done for the day, the rest of the yard can slow down too — see these backyard retreat ideas.